

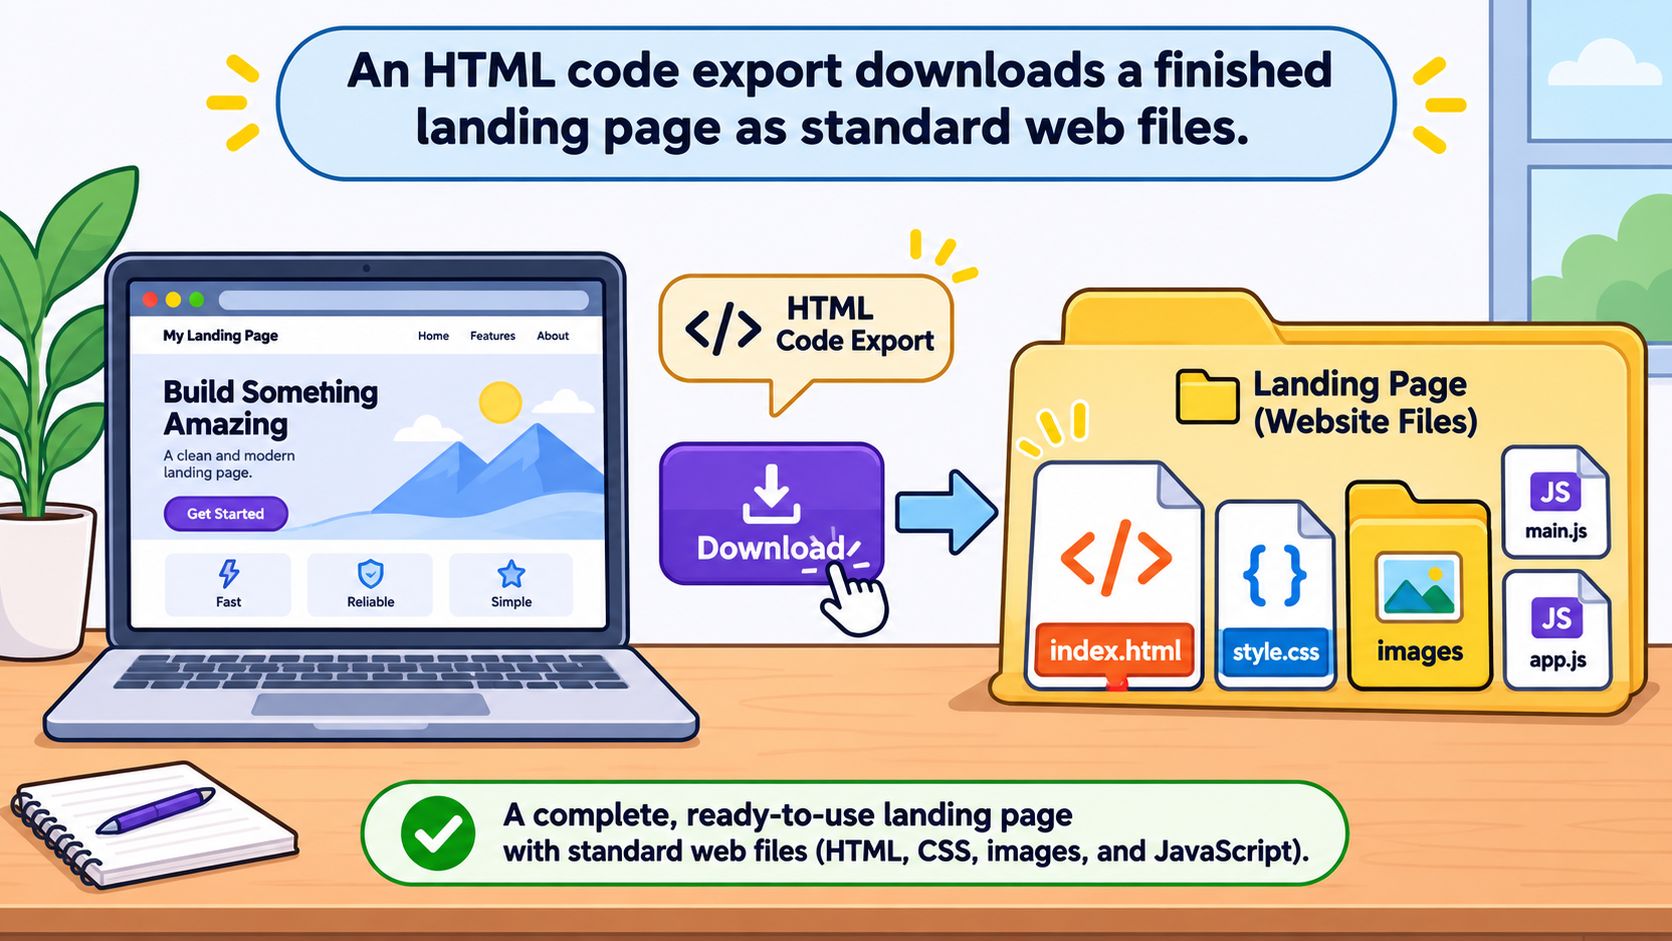
HTML code export turns a finished landing page into standard HTML, stylesheet and image files that you can host yourself. HTML is the most widely used markup language on the web, so the output opens on ordinary hosting and in mainstream browsers without the page builder attached.
You've probably landed here mid-campaign. The advertorial is written, the buyer likes it, and the ad account wants a URL on your own domain. Your page builder only hands over a hosted link on its own subdomain, and that isn't the address you want sitting in a Meta or TikTok ad. With Landra, you can publish to a Landra URL, to Shopify, or as HTML for hosting on your own domain. The export button closes that gap when your campaign needs the page to live on your domain.
Treat the download as a handoff, like passing a printed ad to a print shop. The page files leave the builder, but the editing workspace stays behind. Once exported, the content leaves Landra's systems, and Landra has no control over or responsibility for the exported content. Four things travel with that handoff: the files themselves, the place they'll live, the checks that must pass before paid traffic hits them, and the breaks you'll only discover after upload. Get any one of those wrong and the page can look perfect on your laptop while losing conversions after launch.
Table of Contents
- What an HTML Code Export Is
- Exported Files and What a Clean Export Contains
- Choose Where the Exported Page Will Live
- How to Put an Exported Page Live Step by Step
- Checks to Run on Staging Before Paid Traffic
- What Breaks After Export and How to Fix It
What an HTML Code Export Is
The folder you unzip is deliberately unremarkable. An index.html document carries the structure and the copy, a stylesheet carries layout and colour, an images folder carries the pictures, and a JavaScript file appears when the page needs a tracking tag or a working form. Nothing in that folder needs the builder that produced it.
That portability has a measured basis. W3Techs reports HTML5 on 96.2% of the websites where a markup language can be identified, and its wider HTML figure makes the format a global baseline for publishing rather than a niche technical option. Its counts are usage estimates and one site can use more than one markup language, so read them as a baseline, not a census. The practical consequence is reach: an export drops into ordinary hosting, an existing content management system, an ecommerce theme or a static deploy without a proprietary runtime sitting in the middle.
The comparison that makes it click: exporting a page works like exporting a PDF. The content travels and opens on any machine, but the editing workspace stays behind with the tool that made it.
The snapshot rule
Export produces a copy, not a connection. Change a headline an hour after you uploaded and the live page still shows the old one, because the two no longer share anything.
Version every export with a dated folder name and you can always tell which build is up. Revisions then follow one loop: edit, export, upload, confirm the live URL shows the new copy.
Not a screenshot, not a copy-paste
People blur these three constantly, and the confusion costs a rebuild every time.
- A screenshot is a picture. Nothing in it clicks, and search engines read none of it.
- Copy-pasted text loses heading structure, image alt text and link destinations, so buttons and forms stop working.
- The export keeps all of it as live elements: real headings, real links, real form fields.
Exported Files and What a Clean Export Contains
Open the folder and you should be able to predict its contents before you look. A clean export resembles a flat-pack delivery: structure, fittings and instructions in one box. If a panel is missing, the shelf wobbles and no amount of tightening hides it.
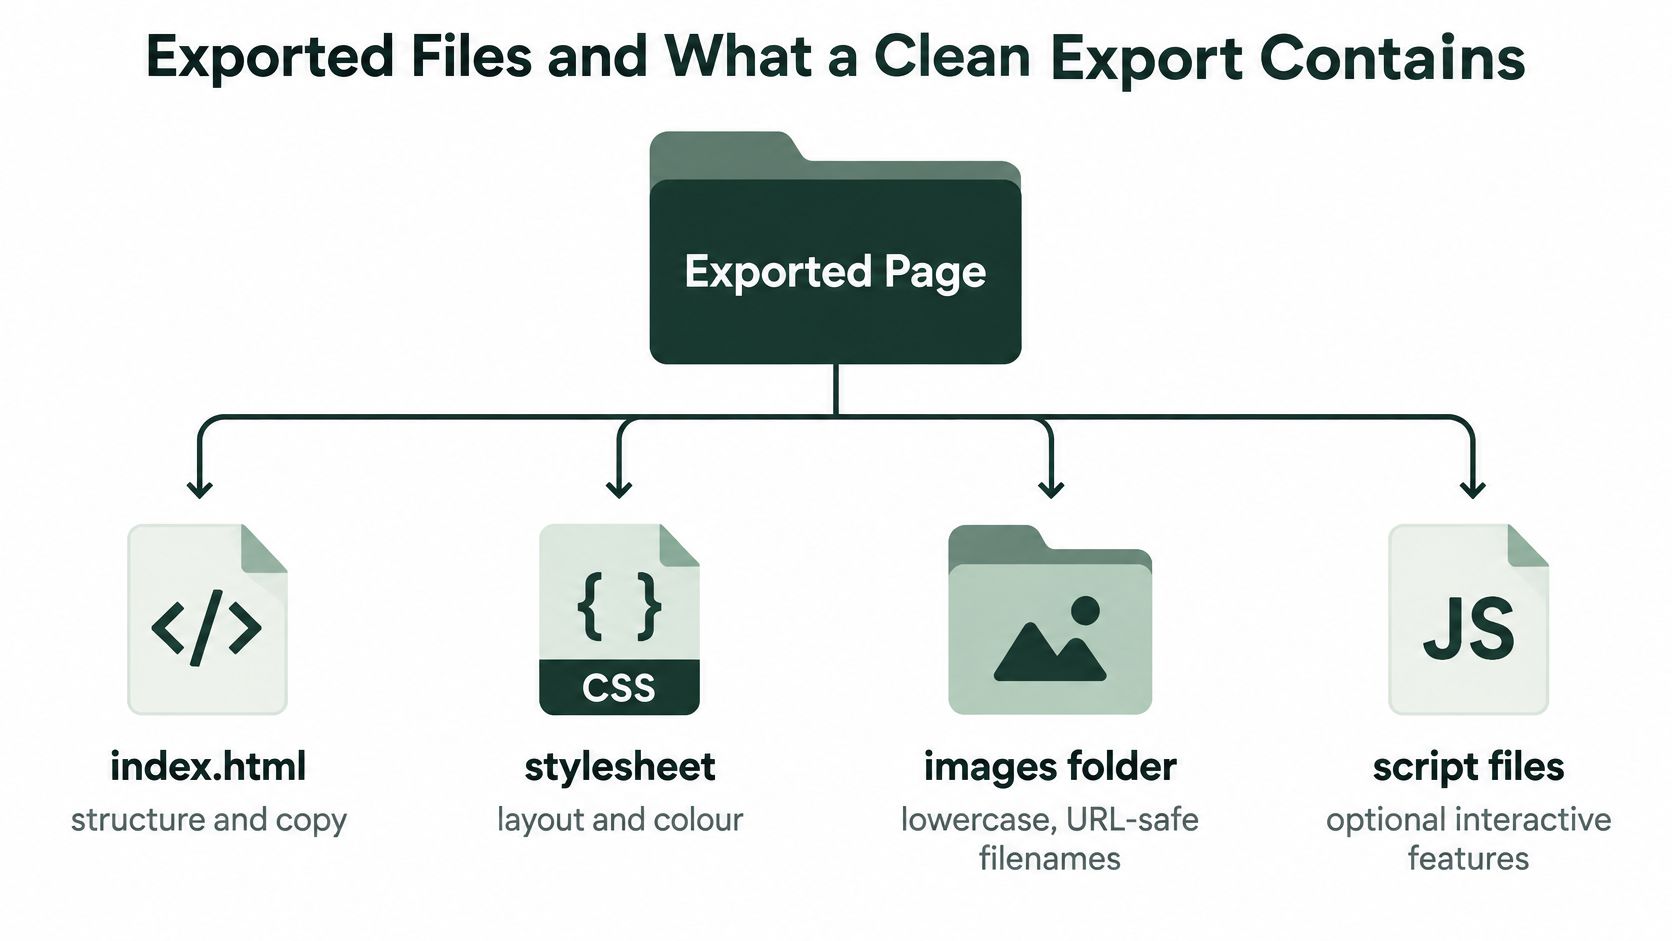
The W3C HTML reference separates conformant documents in both HTML and XML syntaxes, which makes conformance a workable gate before you publish into Shopify, Webflow or static hosting. In plain terms, a clean export gives you:
- Semantic landmarks:
header,main,navandfooterelements, so screen readers and search engines can interpret the layout. - One level-one heading followed by a logical order, not a page that styles every line of copy as a heading.
- Metadata: a declared language on the
htmlelement and a responsive viewport tag, so phones don't render a shrunken desktop layout. - Accessible controls: visible labels on fields, descriptive
alttext on meaningful images, and emptyaltattributes on decorative ones.
Then there are paths. An image written as /images/hero.jpg resolves from the server root, so the moment you place that page in a subfolder such as /offer-name/, the browser asks for a file that isn't at that address and shows a broken icon. Every path should resolve from the folder holding index.html.
Once the pieces are assembled in a browser, this is what they look like.
Package assets predictably, with lowercase, URL-safe filenames and no spaces. Inlining a small slice of critical CSS speeds up first paint, but inlining the whole stylesheet inflates the HTML file and weakens caching, so keep the bulk in a cacheable external sheet. And keep the folder as editable source, because it's the thing you'll change next month, not a finished exhibit.
Choose Where the Exported Page Will Live
Pick the destination before you export, because it decides which tracking, checkout links and forms have to be rebuilt afterwards.
The rule is short. Export when the page must sit on your own domain, when someone on your side will maintain the code, or when your stack already deploys HTML. Take the hosted link when launch speed matters more than the address and a URL on the platform's own domain is acceptable. Publish through your storefront when the page is part of the shop and should inherit its checkout and theme.
Four questions settle it:
- Do you need your own domain? If a buyer, an affiliate or a compliance reviewer expects your brand in the URL, that's export or storefront publishing.
- Will someone maintain the code? Exported files are yours to update, which is a gift with a developer on hand and a burden without one.
- Will the copy change often? Frequent edits mean re-exporting each time, so budget the loop before you promise a quick test.
- Do you need custom tracking or consent logic? Then plan where that code goes and who verifies it fires.
If the address itself is the open question, domains vs subdomains for SEO covers how that choice affects search and brand perception.
| Destination | How the page gets there | What to confirm first |
|---|---|---|
| Your own domain on static hosting | Upload the export folder and serve index.html | Relative asset paths, HTTPS, working form endpoint |
| Shopify store | Publish through a connector or place the markup in a custom HTML page | Checkout links, duplicate theme scripts, CSS conflicts with the theme |
| Webflow site | Embed the exported markup as custom code or rebuild the sections in the Designer | Font loading, custom code placement, existing site styles |
| Custom CMS or ad landing server | Deploy the folder through your release pipeline | Staging test, redirects, consent banner |
| Landra hosted link | Publish inside Landra and share the generated URL | Whether a Landra URL meets your ad and brand needs; export later if you outgrow it |
Landra pages can run on a Landra-hosted link or leave as clean HTML for your own domain. If you're still inside the free trial, you can generate and edit pages within your plan's limits but publishing isn't available, so settle the destination before the trial ends.
Then take one next action: choose a single destination, export that version once, and move on with a staging address in hand.
How to Put an Exported Page Live Step by Step
The first three moves hold most of the risk.
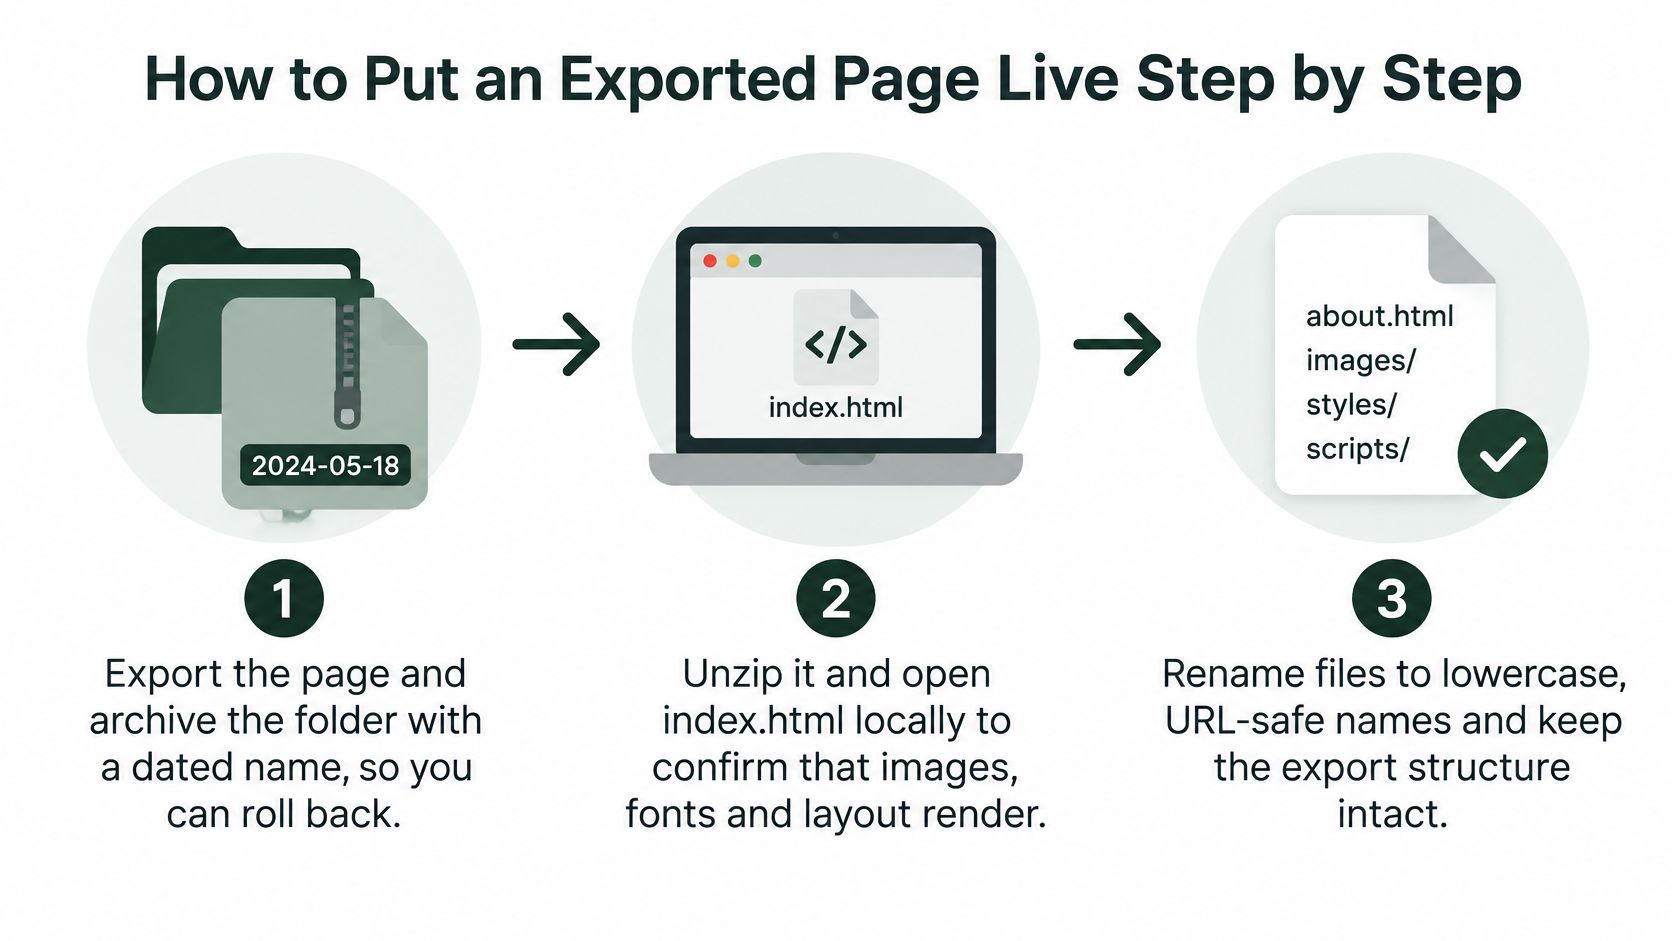
- Export and archive. Save the download as a dated folder, something like
advertorial-glp1-june, so you can roll back to the previous build if the new one misbehaves. - Unzip and open locally. Double-click
index.htmland confirm images, fonts and layout render before you touch a server, because a missing file is easier to spot on your desktop than through a 404. - Normalise filenames. Rename anything with spaces, capitals or brackets to lowercase, URL-safe names, then re-check every path, since one mismatched case breaks an image on Linux hosting even when it worked on your laptop.
- Choose the address. Put the folder at the site root for a dedicated domain, or in a subfolder such as
/offer-name/for a campaign page, and keep that decision consistent with the paths you just checked. - Upload the folder intact. Send the CSS, fonts and images with it, preserving the structure you tested locally, because a partial upload produces a page that loads and still looks broken.
- Test on a real phone. Open the live URL on a handset and on desktop, tapping buttons and scrolling the full offer, since a resized browser window flatters layouts that collapse on real hardware.
- Re-add tracking once. Add the pixel, analytics tag and consent banner a single time each, fire a test event and confirm it arrives, because duplicated tags double-count and missing consent blocks them entirely.
- Point the ad and log the version. Set the ad destination to the live URL, attach UTM parameters, and record which export is live so the creative and the page always match.
If Webflow is the destination, choosing a Webflow landing page template explains what to check before you paste custom code into a project.
A healthy launch looks quiet: no console errors, the form submits to your endpoint, one test lead or purchase reaches analytics, and the URL loads over HTTPS.
Checks to Run on Staging Before Paid Traffic
Put the page on a staging address first, then work through five groups in order.
- Structure. One
h1, headings in sequence, and theheader,mainandfooterlandmarks present. Confirm the language attribute is set. - Content and forms. Every image needs meaningful
alttext, or an emptyaltwhen decorative. Buttons need readable names, each field needs a visible label, and error messages need to be announced to screen readers rather than just flashing red. - Keyboard and zoom. Tab through the entire offer path, watch for visible focus rings, check the order follows the layout, then zoom to 200 percent and confirm nothing overlaps.
- Mobile, speed and validation. Test on at least one real phone rather than a narrowed desktop window. Run an HTML validator and Lighthouse, and follow the critical rendering path guidance on web.dev so the HTML arrives first and non-critical scripts use
deferorasyncinstead of blocking the parser. Measure Time to First Byte, First Contentful Paint, Largest Contentful Paint and total blocking time, then corroborate with real-user Navigation Timing data, because a lab run on office wifi hides what a mid-range Android on 4G experiences. - Consent. Confirm third-party scripts wait for consent before they load, which is the difference between compliant measurement and a complaint.
The failure rate here isn't hypothetical. AccessibilityChecker.org's 2025 ecommerce study, covering 100 high-traffic retail platforms, found that only 11% of cart and checkout pages met minimum WCAG requirements, with an average score of 65 out of 100 and recurring failures in contrast, labels and images. A page can look identical to the design file and still fail that bar.
Automated tools catch missing alt text and low contrast. Manual keyboard and screen-reader runs catch everything else.
Pass rule: the page is ready when automated checks report no errors and a keyboard-only run completes the offer path.
Before you point money at it, also check SSL and backups before launch, and work through Core Web Vitals fixes for DTC pages if Lighthouse flags the loading metrics.
What Breaks After Export and How to Fix It
Assume something will break, and make the breakage easy to name. Start from the symptom.
| Symptom | Likely cause | Fix |
|---|---|---|
| Images missing after upload | Absolute paths point to the editor's temporary URL or the wrong folder | Rewrite to relative paths and re-upload the assets folder |
| Layout breaks on phones | Viewport tag or media queries lost during a theme merge | Re-add the viewport meta tag and media queries, then retest at phone width |
| Fonts fall back to defaults | Font files not packaged or blocked by the host's security policy | Host fonts with the page or allow the font origin |
| Conversions not tracked | Pixel removed, duplicated or blocked by consent settings | Keep one copy of each pixel and fire a test event |
| Form submits nowhere | Form action still points to the editor's endpoint | Connect the form to your own endpoint and send a test entry |
| Checkout links return 404 | Product URLs were hardcoded at export time | Update links to live product URLs and recrawl |
| Page shows old copy | Edits made in the editor after export aren't in your copy | Re-export, version the folder and redeploy |
| Styles clash with the store theme | Theme CSS overrides export rules | Scope export styles inside a container element |
Static HTML is not automatically faster or safer. It can cut runtime dependencies, but duplicated scripts, unoptimised assets or a missing consent control create fresh performance, measurement and governance problems that a managed platform was handling for you. The failures that bite hardest are the invisible ones: missing accessible names, non-descriptive buttons, stripped image alternatives, broken heading order, all of which show up when a destination CMS rewrites your markup. UsableNet's work on reducing cart abandonment traces exactly this kind of friction into lost checkouts.
Run a deployment diff
Version every export in a dated folder, deploy to staging, then crawl the live page against your source and compare links and assets. Inspect network requests for scripts that shouldn't be there, validate analytics events on both mobile and desktop, and keep the previous folder ready as a rollback. That audit takes twenty minutes and answers the only question that matters after launch: does the page still do what the design promised?
Once you export HTML, the files leave Landra's systems and Landra has no control over or responsibility for the exported content. That's normal for a handoff, not a warning. It just means the team that uploads the page owns its copy, its accessibility and its consent behaviour from that moment on.
Every page you build in Landra can leave as clean HTML you host on your own domain, or stay on a Landra URL if you'd rather not touch a server at all. You keep the editable source either way, so the handoff doesn't lock you into one destination. Start with a product URL, watch the first draft appear in about two minutes, then run it through the staging checks above before the ads go live at Landra.